If you are using Stability AI Cloud Service just select "SD Cloud" and enter your API Key (you find in your profile in Dreamstudio)
“SD Local” is using another server - check here for full documentation.
For Installation of Gyre on Windows PC there is One-Click installer.
A good GPU is needed from NVIDIA only (2600 or better, min 6GB RAM). You cannot run the server part on a Mac or with an AMD card. Mac computers (even the most expensive ones) have very low GPU power for this kind of task. So using a Mac as a server would be more a "proof-of-concept" than a usable solution for daily work because it is just too slow.
After setup just put that link in "Gyre" Configuration. You can test the server by opening the web interface (e.g. http://127.0.0.1:5000) in the browser.
In Plugin add a Gyre configuration and select a model first
New: use integrated AI Studio for editing
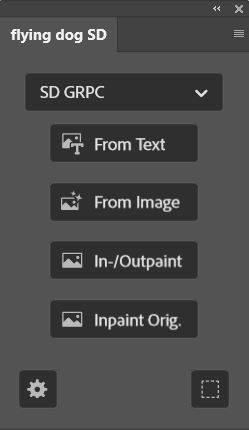
The main panel offers access to different configurations in top menu and also offers Buttons for each functions:
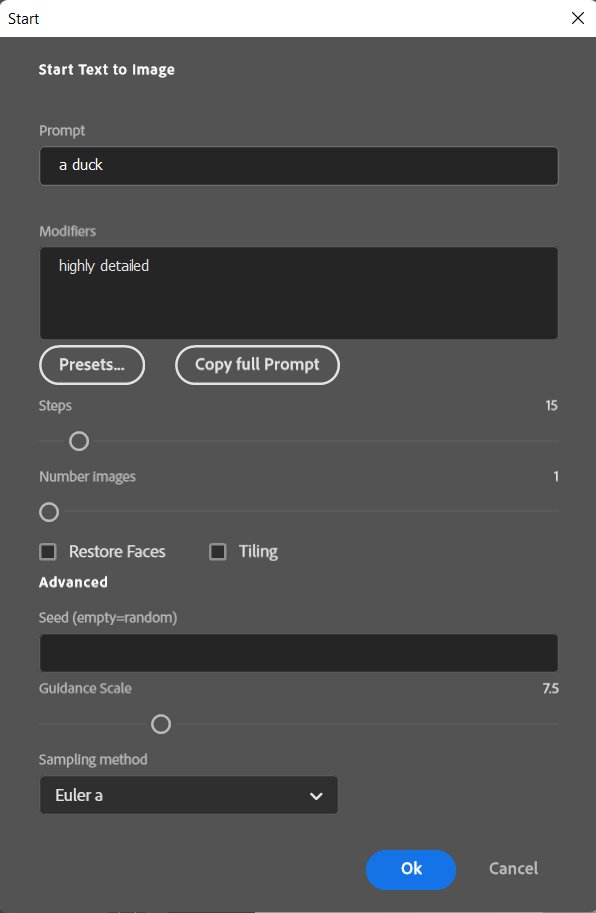
Prompt: enter whatever you want to see in text input (e.g. "a cat in suit" or just “ a duck” like in the screenshot).
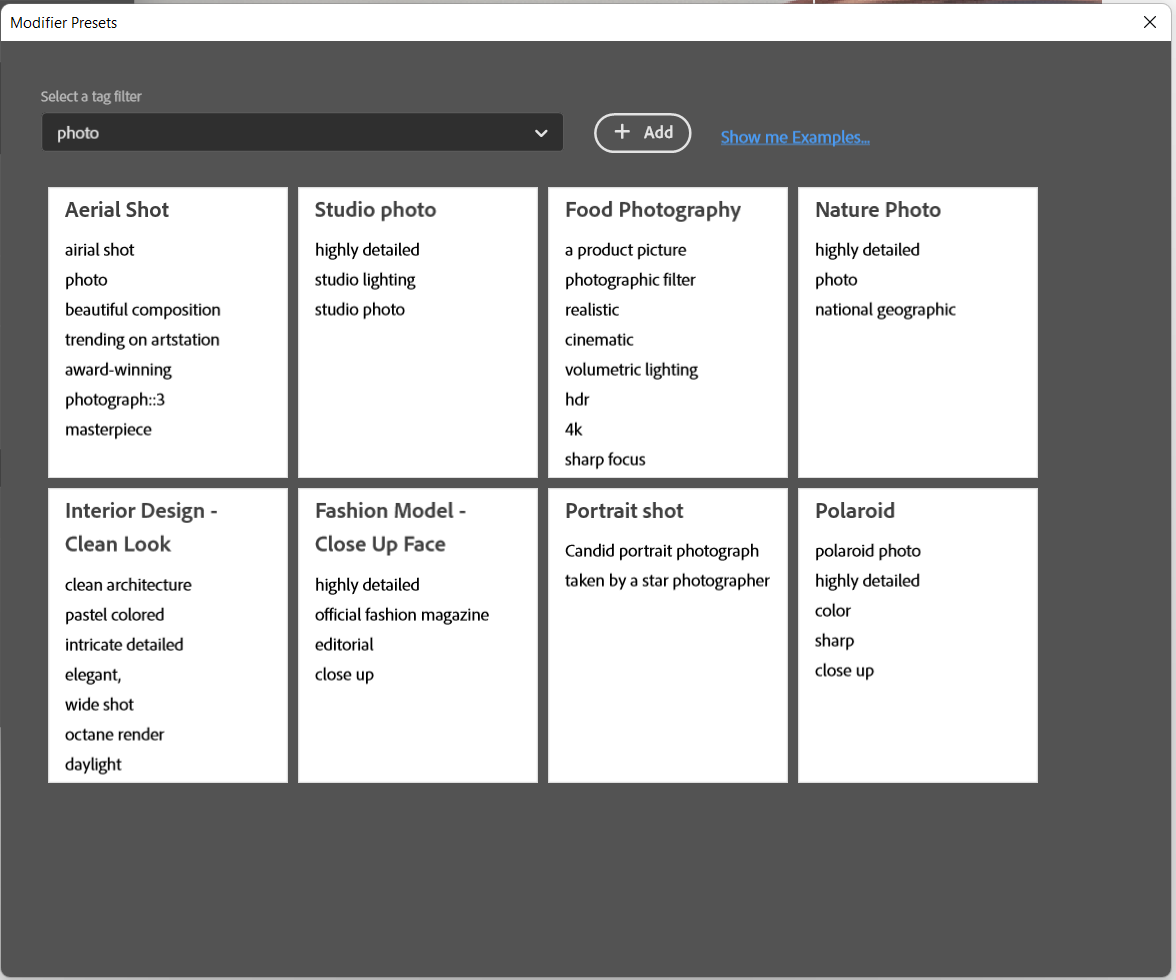
We have separated the so-called modifiers from main prompt input. And so you can define modifiers for individual styles below prompt input. You can also manage your own library with modifiers. Each list of modifiers can be assigned to tags which can be selected at the top as category:
Switch to Modifier ideas for a quick selection of styles:
So with that separation you can quickly change the style of a prompt with manually typing or copy/paste a long string again.
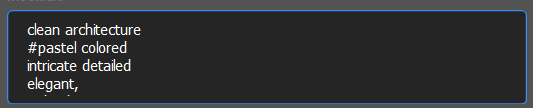
We also implemented to comment out a line in modifier box:
In this example "pastel colored" will not be part of the full prompt.
Negative Prompt: add a Minus (-) in front of a line of a Modifier
Steps
This is the second most important parameter for Stable Diffusion AI and we recommend that you play around with this and get some kind of feeling here with it. We made this an easy task. So you can start with a low step value first (e.g. 15) and in the preview dialog you can update individual images with higher values to get more details/better quality pictures. But this depends on the subject/prompt and also the sampler (see below).
Low steps values need less computational time and results come more quickly. If you are using Cloud configuration it costs less here.
So for example if you have a 3600TI. Generation of 4 images at step value 15 needs only around 8 seconds (2 seconds each). And one image with 50 steps needs the same amount of time.
Other parameters
About Sampler (advanced reading):
The ancestral algorithms (Euler a and DPM2 a) do better at lower step values and Euler A tends to diverge at higher steps rather than converge. The other algorithms, especially LMS, benefit from additional steps and a slightly higher CFG. They tend to converge on an image, so as the steps go higher, the image only changes in small ways. It's the early steps where it can vary more. Euler A works better with a CFG around 5-8, and Euler/LMS do better with 7-12. For simpler/short prompts, fewer steps, Euler 32 @ CFG 8, produces the most realistic pictures. We recommend to start with around 15 steps (in Euler A) or with 30 at LMS/DDIM and try higher values (like 50) in the preview screen for individual image updates.
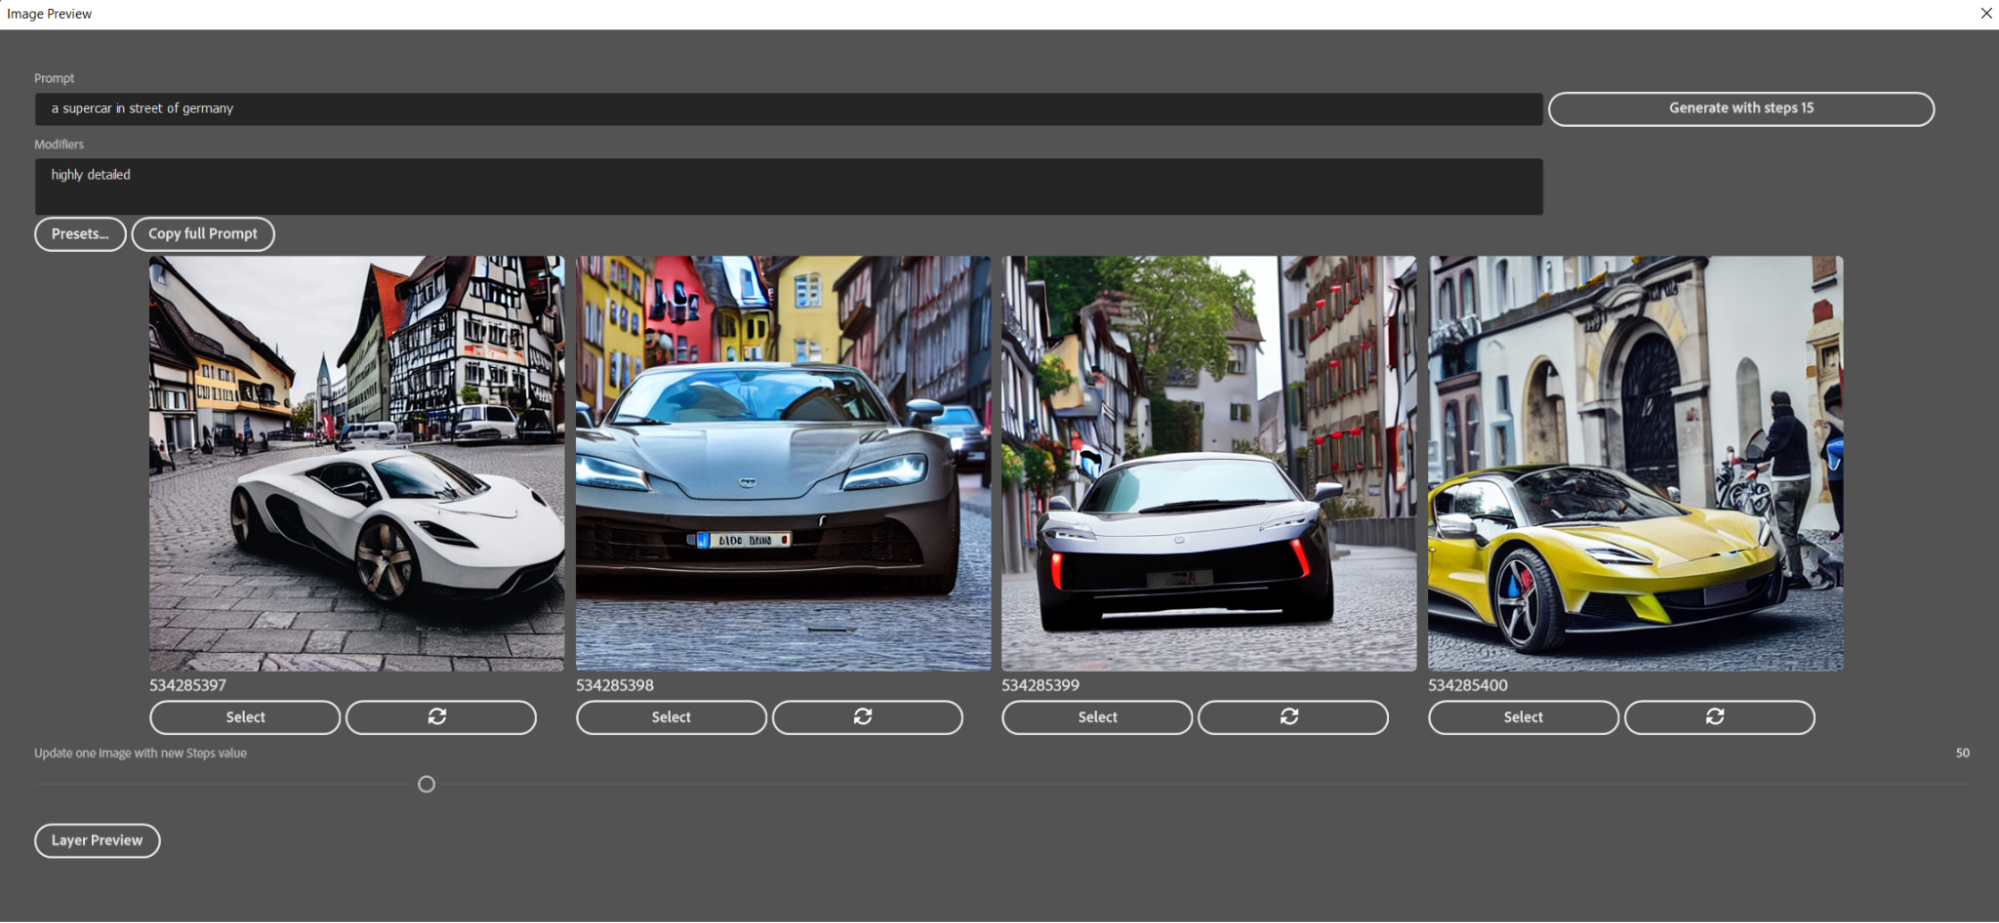
After starting image Generation you will see a preview window. Here you can select an Image or regenerate it with another Steps value (Update icon below image).
For Image to Text and Inpainting Original a Strengths value is also provided for
fine-tuning.
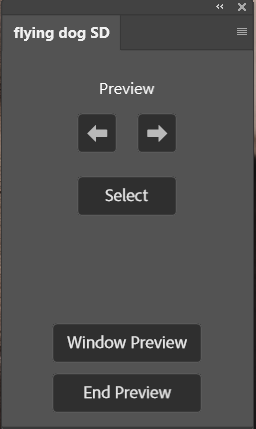
Click On “layer Preview” for Inline-Preview of images on Canvas:
Now you can browse through the images and Select the current one as well.
For this preview a temporary layer group “_ai” will be generated.
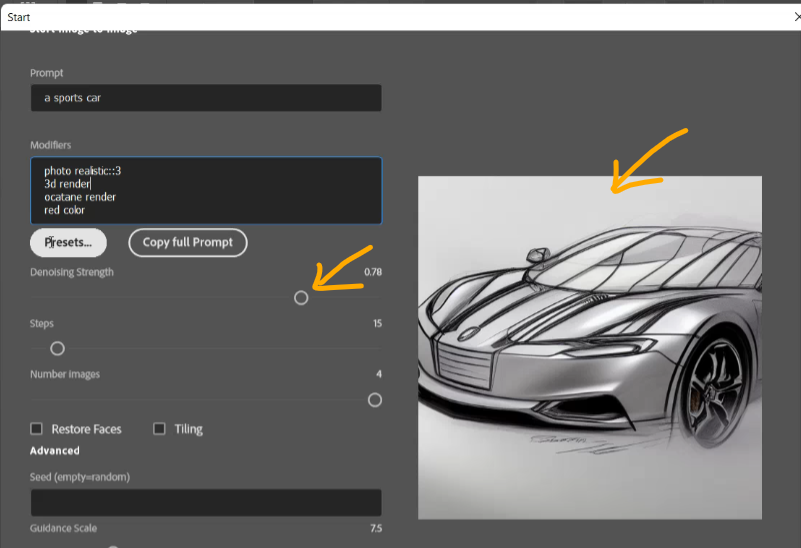
In this mode you can adjust an existing image to draw it in a new style. This is much more powerful than other so-called "style-transfer" algorithms but it also works differently as well because it uses the input of the prompt plus an image.
On the right you see the selected image which will be used for image generation.
Denoising Strength: with this parameter you can guide how strong the result should follow the original image or the prompt. So with very high value the result might be something completely different from what you might expect - just similar to Text to Image without using an input image. So we made it easy to find the correct value by offering an update of image generations in the Preview screen similar to the steps parameter for fine-tuning the result.
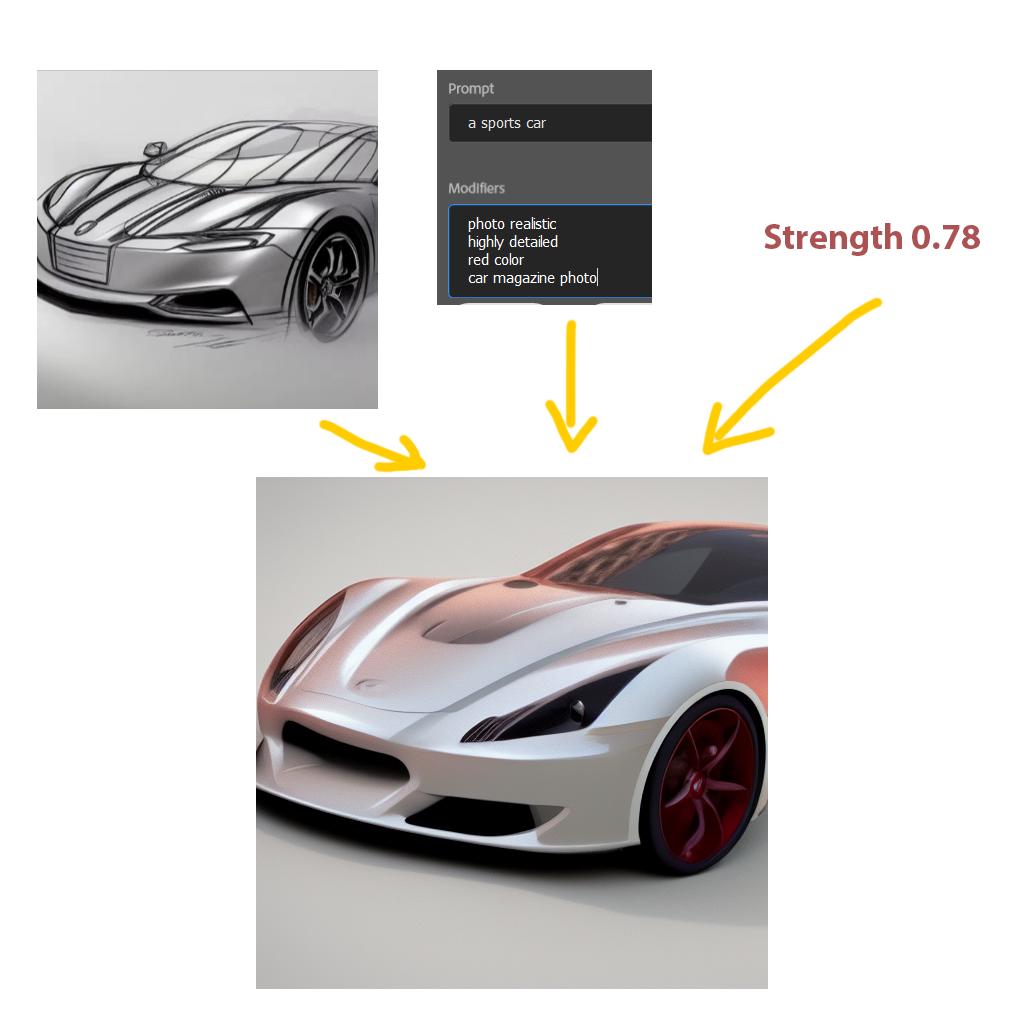
Here again these three parameters in same example from above and result image:
With this feature pretty amazing things can be made. So a children's drawing could be transferred to a more professional one or vice-versa.
With Inpainting a part of an existing image can be changed. There are different variations of this technique known:
1. Normal Inpainting
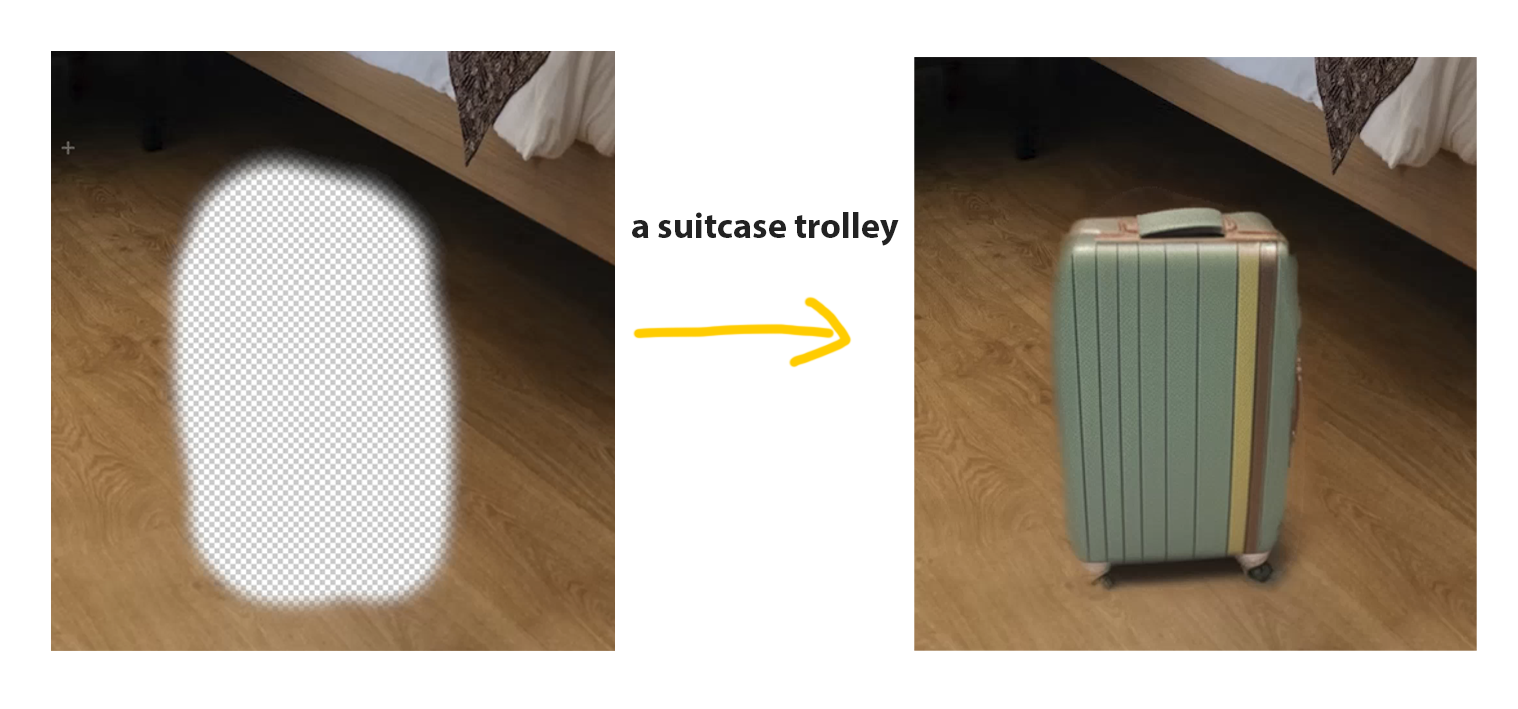
First remove a part of an image. Then make a selection big enough that AI can understand the surroundings and close enough to have good resolution. The erased part should match the prompt. Otherwise, the object in inpaint might be cut off at the edges. The hotel room example from the video explains quite good what is important here:
If there would be only "a suitcase" the AI mostly generates not an upright one which would not fit in this area. So with additional "trolley" the results match very well to the erased area.
2. Original Inpainting
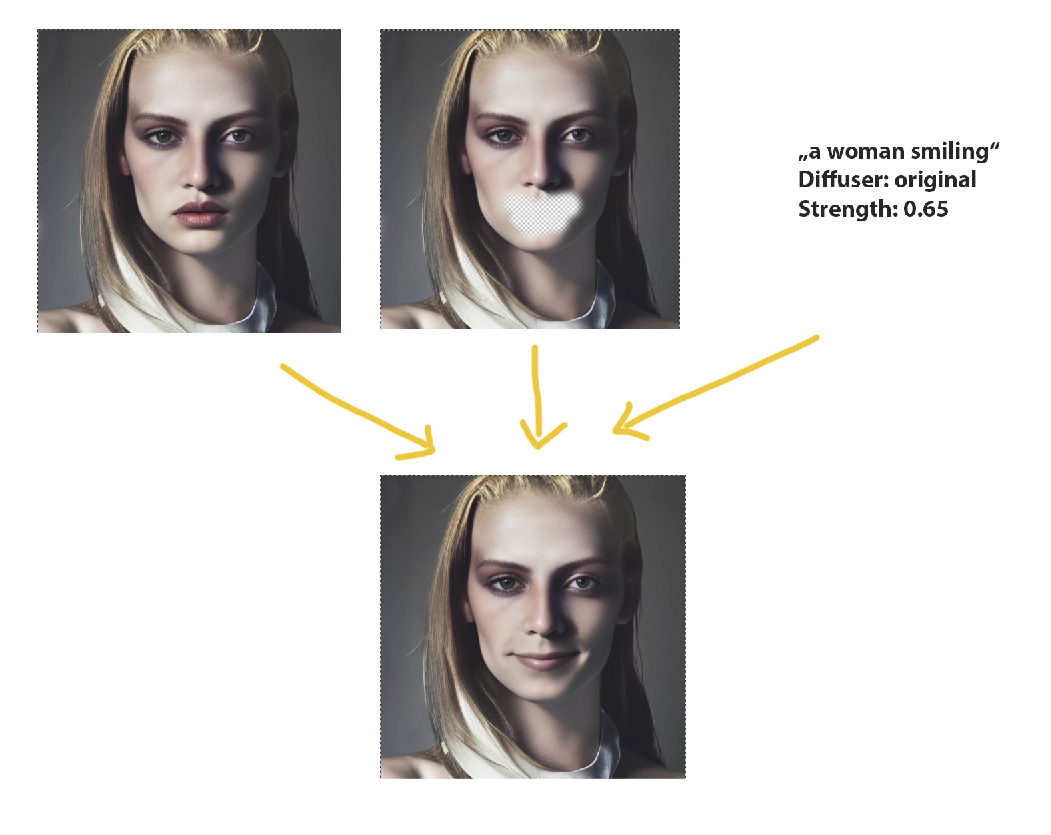
If you want not an new object in scene but to just change the style of an existing part of the image. The "Original" Inpainting delivers great results.
As you can see beside the prompt another image is needed - the original one. This means that the AI not only works on one image with a hole in it - it also uses the image data from the area before it has been erased. So this technique is some kind of "cheating" because it depends on that original data. Our plugin handles it like that: the current selection of the current layer is used for the mask (image with erased area - the middle one in example above). The other layer with all image data is searched by the layer name. So it looks for a layer with the same number in it. If it cannot be found, it uses the first layer. In configuration the Diffuser has been set to "original" here. Also set the strength value is not so high (something above 0.5)
3. Outpainting
This has been added in version 1.1 (GRPC Server only) and offers state-of-the-art Outpainting. But it has the same limitations like other Outpainting (e.g. DALL-E 2) because it uses only a part of an image for extending it. So it does not know the whole context. For example: using Outpainting on existing photos is quite difficult or impossible.
To keep a consistent image:
Image size
Stable Diffusion has been trained on images with size of 512x512. Therefore the default selection matches exakt that size. If you change that size in configuration please be very careful:
Model
In case the server provides more than one model you can click on “Get Models…” to read all available models.
The Diffusion parameters of SDLocal are not needed anymore so it had been simplified at all.
M1 Fix
There is a bug in Photoshop which does not allow image operations while having a dialog open. So it is recommended to check this box if you are using a M1 Mac.